Blog

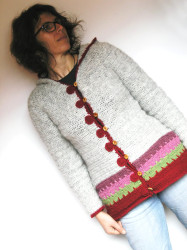
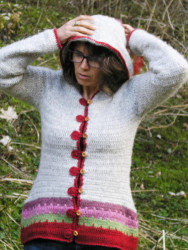
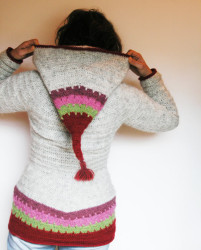
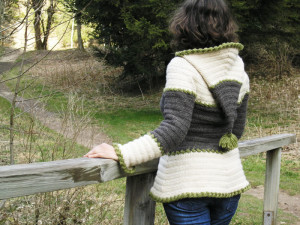
Leontine, crochet pattern by Sylvie Damey

I’ve been thinking about this for a long while now:

  • writing crochet patterns which are getting more and more detailed, with 12 pages of step-by-step instructions, tons of in-progress pictures and 3 pages of tutorials
  • unanimous praise for “clear and easy to follow” instructions in my patterns
  • and yet, it’s still difficult to make ends meet seing the amount of time spent on : writing the instructions, crocheting and ripping the samples until they are perfect and fit just right, editing the instructions and layout, taking photos and editing them, and finally getting the pattern tested (thanks to my amazing testers) to tweak and edit again the instructions until no typo or mistake remains and everything is crystal clear…  In the end, Loup and Lŕ©ontine took me about a full month each to crochet and write down. A full month !
  • however, this is my JOB and I need to pay the rent at the end of the month…

Leontine, crochet pattern by Sylvie Damey

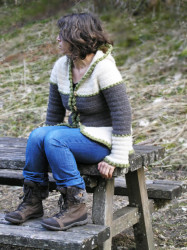
So I finally took a decision. Instead of being frustrated, I’ll be raising the price of my 2 most detailed patterns,
LOUP and LEONTINE on May 1st.  (all the other prices will remain unchanged)

Of course I’m telling you ahead… so you still have a little time ahead. If you’ve been eyeing those patterns, Hop ! Now is the time to grab them at the “old” price of $6. (valid until April 31th 2016)

Grab your copy now on Etsy or Ravelry !

Fini6lighter New1 Fini10Rpompon

Buy the LOUP pattern  (was $6 – Now $8)

Leontine, crochet pattern by Sylvie Damey Leontine, crochet pattern by Sylvie Damey

Buy the LEONTINE pattern (was $6 – Now $8)

Yes, I’d love to hear about Sylvie Damey’s next articles & patterns !


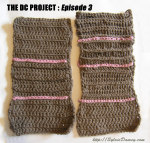
Ever since I started the DC project, to experiment with all the different options to crochet a Double Crochet, it felt like I’m on a mission to spread the news that the place where you insert your hook DOES make a huge difference !

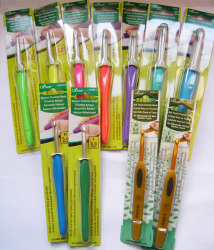
To help spread the word, and thanks to the generosity of Tulip Etimo and Prym (who so graciously sent extra hooks on top of the ones which are used in my crochet hook testing),

Here’s a GIVEAWAY to win:

  • 1 Tulip Etimo Rose 2 mm crochet hook
  • 1 Tulip Etimo Rose 2.5 mm crochet hook
  • 1 Tulip Etimo Rose 4 mm crochet hook
  • 1 Tulip Etimo Rose 4.5 mm crochet hook
  • 1 Prym “Soft” 5 mm crochet hook
  • 1 Prym “Soft” 6 mm crochet hookCrochet hook giveaway

To enter, simply crochet a swatch from any of the Episodes so far of the DC project

And send a photo of your swatch (1 picture only per Episode and per person)

  • to “the first 4 letters of my first name = s – – v” @sylviedamey.com
  • or post the picture in a comment to Giveaway photo on my Facebook page

Deadline: April 20th 2016 (midnight french time)

I will enter all the pictures in the “DC project” photo album on my Facebook page. Once deadline is past, one picture will be randomly chosen to win those 6 crochet hooks (package sent worldwide)


Good luck ! I can’t wait to receive your pictures !


DC project by Sylvie Damey Crochet cables - DC project by Sylvie Damey Dc project by SylvieDamey Back post dc, SylvieDamey.com Dc project by Sylvie Damey


See all the Episodes of the DC project:
DC project Episode 1
DC project Episode 2
DC project Episode 3
DC project Episode 4
DC project Episode 5
DC project Episode 6
DC project Episode 7

That first spark…

Poms9

After weeks of making pompons, teaching the basics of knitting and crochet to kids and adults during our wednesday free workshops at our local library, it’s been a huge pleasure to install the first pompom garlands and armchair cozies.

Bib2
The goal of those workshops: spend a joyful hour together, share a few techniques so that they can see the possibilities, touch yarn, feel the textures and play with colors, … and eventually when they come back and show us the hats and scarves they’ve knit at home, it feels like we’ve accomplished a lot.

Poms11  Poms5
To teach a variety of basic skills while keeping it fun, I chose to focus on 3 things: How to knit, with scarf-like pieces made in garter stitch to cover-up the black kids armchairs. Every participant has the possibility to pick their own colors and change colors whenever they want. Making it a total collaborative project !

We also made basic crochet chains, to use as base of the pompom garlands: This time, I wanted to keep it simple yet let them experience what it feels to manipulate a crochet hook and yarn. Some of the ladies who came got quickly interested in learning more and we showed them how to single crochet. That is a total bonus in my book !!

And finally.. pompoms because they’re fun to make, and it’s still a great way to start playing with yarn, colors and textures !


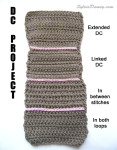
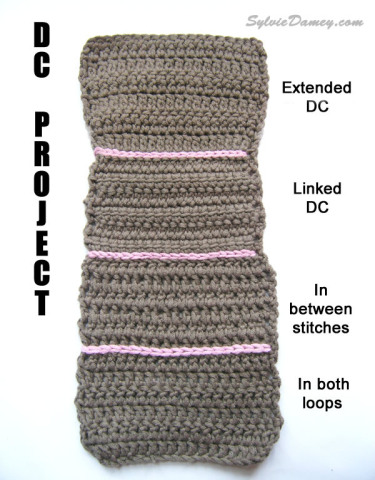
Have you made your first swatch from Episode 6 yet ? Great ! Take it in front of you and let’s explore all the differences we can find between
– dc in both loops
– dc in between stitches
– linked dc
– extended dc
(all worked in rows at this stage)


Btw, make sure you share your pics of finished samples : a winner of 4 Tulip Etimo Rose crochet hooks + 2 Prym Soft hooks will be randomly chosen among all those published in the Facebook collective album « DC project » (send photos through FB or by email to « the first 4 letters of my firt name A.T. sylviedamey.com )


DC project by Sylvie Damey

1/ TEXTURE & VISUAL APPEARANCE:
The most obvious difference is in the texture and visual look.

dc in both loops => flat surface, stitches look neatly stacked on top of each other

in between stitches => very textured look, reminiscent of weaving, with alternating rows of stitches going over / under… Because you work in between stitches, the gap located between each stitch is approx. the same width as the post of a dc. The fabric is surprisingly soft and airy, moving easily despite the thickness of the fabric.

The DC project by Sylvie Damey

Linked dc => what you’ll notice first about this stitch is how there is hardly any gap at all between the stitches. In fact, it’s hard to tell apart one stitch from the other.. or even one row from the other ! The resulting fabric is quite flat with rather discreet horizontal lines across. But it’s very dense and thick!

Elongated dc => it’s quite surprising to notice how close visually this stitch is from dc in both loops.
The only difference I can see is really that the elongated dc is… longer ! Thus the name ;-) But when touching it, the fabric also looks thinner and more drapy. As if the added chain stitch relaxed the fabric and added drape to it. When looking through a window, you can also see that the gap between stitches are much smaller than with dc in both loops. All in all, all this goes to show that this stitch does have its very own properties and is probably worth trying on a larger scale !

2/ SIZE

Let’s take measurements of each section of your swatch. Here’s what I found on mine, measuring over 15 sts and 4 rows :
(reminder: I used the same size of hook to crochet each stitch variation!!)

dc in both loops => width 10.1 cm – height 4.2 cm => Let’s use this as our reference measurements.

In between stitches => width 10 cm – height 4.3 cm = > dc in between stitches is 1% narrower and 3% taller than dc in both loops.. (hardly any difference this time !!!!)

Linked dc => Width 9.9 cm – height 4.3 cm => linked dc is 2% narrower and 3% taller than dc in both loops.. (hardly any difference here again !!!!)

Extended dc => Width 10.3 cm – height 5.7 cm => Extended dc is 2% larger et 36% taller than dc in both loops.

Now, here are again some very interesting results !

It’s quite fascinating to observe how dc in between stitches and linked dc are nearly exactly similar to dc in both loops when it comes to measurements. Not to worry about gauge issues if you substitute one for another in that case…
However, and just as we thought, Extended dc is a lot taller than the other dc variants of this episode. If you have crocheted a sample, you’ll also be able to see by yourself how its thinner fabric looks promising in terms of drape. Makes me want to try it on a larger scale…

3/ STRETCH & DRAPE

Now, those parameters are more difficult to assess on such a small swatch. But here’s what I learnt from experience. You can also stretch your swatch in all directions to notice the differences:

dc in both loops => solid fabric. sturdy. does not stretch much vertically.

In between stitches => thick fabric, yet surprisingly drapy. Limited stretch, both vertically and horizontally.

Linked dc => hardly any drape at all. Limited stretch, although fabric does stretch a bit more vertically through the beginning of each row.

Extended dc => promising drape, thin fabric. Stretches more horizontally.

4/ BEST USES

Now, with all these parameters in mind, let’s try and see which types of project use each variation of the dc :

dc in both loops => see conclusions of episode 2

In between stitches = > I was really surprised by this stitch variant, in a good way. I love its texture, and depending on the size of hook you’d use, it could make really pretty and functionnal baskets or produce bag, or even an airy textured summer tank top…

Linked dc => seeing how there is hardly any gap in between stitches, this variant of the double crochet could make perfect handbags or coin-purses: no more lost coins or little things through the stitches of a purse !

Extended dc => I really like the texture and thinness of this stitch, and would love to see the result when used in a garment. Maybe even try to work an extended dc in the front loop only ? Who will try this first ?

5/ WORKING IN THE ROUND
Working in the round changes the visual aspect of all 3 of those stitch variations. I’ll explore this in a further episode…

*********************************************************************************************************************************************
How about YOU ? Anything I forgot or didn’t see in those swatches ? Please share in the comments !
*********************************************************************************************************************************************
See also:
DC project Episode 1
DC project Episode 2
DC project Episode 3
DC project Episode 4
DC project Episode 5
DC project Episode 6
DC project Episode 7

Bertille boleros for the girls

Bertille Bolero, crochet pattern by Sylvie Damey

My daughters have been relentlessly asking for summer boleros with long elf hoods…

Bertille Bolero, crochet pattern by Sylvie Damey

Now they each have their own Bertille bolero !!
(but dumb me: I can’t find my own now, so no group photo !)

Bertille bolero, crochet pattern by Sylvie Damey Bertille Bolero, crochet pattern by Sylvie Damey

For the younger one I aimed at making a size 10 yo with fewer body sts and a shorter hood (I took notes, might publish a teen version someday)

For my daughter though, I simply used one size smaller hook (5 mm instead of 5.5 mm) and made a size XS. Worked out perfectly, esp. as the crossover fronts are quite forgiving. That will leave her some room to grow.

I’ve also edited the pattern on Etsy, Craftsy and Ravelry to include those pictures and notes on how the work the contrasting bobbles

So now the only question is: Should I make another one for me ? I’ve already searched everywhere in my office and can’t find it. Bummer.

Sorry for the weird look !

My blog was hacked, and it turns out they’ve actually hacked my WordPress theme.

Until we can figure this out, I had to change the theme… resulting in a very weird look.

Sorry about this ! But at least you won’t be redirected to spammy websites any more (crossing fingers)

ETA: Yipee for my husband who fixed the issues.
Tip: if you’re using WordPress DO make sure you update whenever WordPress tells you to. Because sh-t does happen and the hackers will find you.

AllENGL

Let’s explore today more variations on the DOUBLE CROCHET:
– starting again with the dc in both loops as refence
– dc in between stitches
– linked dc
– extended dc
DC project by Sylvie Damey
First, choose your yarn. No fun fur or bouclŕ© yarn, you want neat stitch definition for this project.
I’m using the long-discontinued Rowan “All seasons cotton”
You’ll also want to have enough of this yarn to make ALL the samples of the series. I’d say have at least 200 m…
Choose a hook which works well with this yarn: crocheted fabric should be not too tight, not too loose. I’m using a 5 mm (H) Tulip Etimo “Rose” hook (starting the test of all those hooks)

Step 1 – REGULAR DC = DC IN BOTH LOOPS

Let’s start our sampler with 6 rows of DC in both loops as a reference to compare the other stitches to.

Dc1ENGLISH

Chain 22.
Turn and work a double crochet (dc) in 4th chain from hook. Then dc in each chain across. Turn work. You should have 20 sts (including initial ch3, which counts as 1st st. I know there are options for this, but let’s keep this for later)
We’re now going to insert the hook under BOTH loops of each stitch: when you look the top of the stitches, you see a “V” sitting on top of each dc. Both legs of the V = both loops.

Dc3

You have now 6 rows of dc in both loops. Mark last row of dc in back loop with a stitch marker.

Step 2 – DC IN BETWEEN STITCHES

DCinBetweenSts

To work this first variation of the dc, let’s insert the hook NOT under both legs of the V sitting at top of each st, but BETWEEN the posts of the dc in previous row.

Let’s see how:

1
Start with chain 3,

2
Yarnover and insert hook between the first (located under the ch3) and 2nd DC posts from from row below, and work a regular double crochet…

3
You’ve just made your first DC in between stitches. Arrows show where hook was inserted for first dc, and where to insert hook for the next 2 …

4
For next dc, insert hook in between 2nd and 3rd dc post from row below

5
And continue likewise on rest of row…

6back
Side note – If you have a look at the Wrong Side of work, you’ll see that working in between stitches creates bulkiness over the base of stitches: when working between the posts of row below, you actually encapsulate all 3 strands of yarn together. To me, it nearly looks like weaving… What do you think ?

7
To end row, make sure you don’t miss the last st: insert hook between last-but-one post and last post from row below.

8ENGL
Continue likewise for the next 5 rows. You end up with 6 rows total of DC in between stitches.

Mark last row of dc in between stitches with a stitch marker.

Step 3 – LINKED DOUBLE CROCHET

LinjkedDC2

We are now going to make Double Crochets which are, as indicated by their name, linked together. With this stitch, there will be hardly any gap in between the stitches.

In order to achieve this, we’ll “replace” the very first yarnover by a slip stitch in one area of the previous dc. This will link together the stitches, as if the Double Crochets were holding hands tightly.

9
Start with chain 3.

10
Insert hook in 2nd of the 3 chains,

11
And work a slip stitch. You have 2 loops on hook.
Important : This slip stitch will “replace” the initial yarnover of next dc !

12
Now for next dc, ** do not yarnover, but insert hook directly under both loops of next st,

13
yarnover and pull through (3 loops on hook),

14
yarnover and pull through 2 loops (you have 2 loops on hook),

15ENGL
Finally, yarnover and pull through last 2 loops on hook. YOu have finished the first linked dc. (1 loop on hook)

15
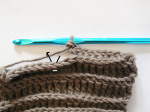
Now to start the 3rd linked dc: Watch closely the linked dc just worked. Can you see the horizontal bar about halfway up ?

16
Insert hook from top to bottom in this loop,

17
1 slip stitch in this loop,

18 19
and repeat from ** to make the next linked dc.

20
You now have 3 linked double crochets.

21
Repeat the procedure to end of row,

22
And make sure you work the last st in top of the chain 3 from row below, at the end of row.

23
Repeat until you have 6 rows total.
Mark last row of linked dc with a stitch marker.

I don’t know about you… but to me, this nearly looks like crocheting 2 rows of single crochet in 1 row of double crochet. Weird, right ?
Anyhow, you may find that the rows are more difficult to differentiate when counting them. And this time, you cannot separate the sts to count the posts either ! (count the Vs at top of row)
To count the rows, I refered to the horizontal line halfway up the row, on the Right Side.

Step 4 – EXTENDED DOUBLE CROCHET

ElongatedDC
Now, let’s work double crochets which are taller (elongated) than usual. To do this, we’ll very simply add a chain somewhere along the way while making the dc…

24
Start with chain 3, then * yarnover and insert hook under both loops of next st,

25
Pull through, ( 3 loops on hook)

26
And BAM: here’s where it changes ! Chain 1 (still 3 loops on hook)

27
yarnover and pull through 2 loops (2 loops on hook)

28
yarnover and pull through last 2 loops.** You have finished your first extended dc.

29
Repeat from * to ** across row.

30
Continue to work in extended dc until you have a total of 6 rows.
Do not fasten off yet, as I have a little something left in store…

Now. Those extended double crochets look quite similar to regular dc (= in both loops) except that they’re taller.
I don’t know about you, but I’ve been wondering: how tall are those ? Taller than Treble Crochets ?

Let’s double check this in a minute: before you cut the yarn, try to make a few Extended dc, followed by a few Treble crochets:
31ENGL
Pfew ! Treble crochets remain taller than extended dc.
This may be a good thing to remember, when working a panel of stitches of different heights (like I did for the Loup jacket, or the Babouches for instance…): In between the Double and Treble crochet stitches, the extended dc fits just nicely !

Etape 5 – Sŕ©parer visuellement chaque partie

Bravo, you’ve now finished this fourth sampler !

Just as we did for the other samplers, let’s separate each section by a line of surface crochet, using the stitch markers to visualize where to stitch.

32

Holding working yarn UNDER work (= on WS), work in loose slip stitch so as not to alter width of sampler. Fasten Off.
Finally, admire your sampler ! Can you spot any difference between all those variations of the dc, or decide which best use could be applied to each variation ?


DC project by Sylvie Damey

Now it’s your turn: share your pictures of your sampler so I can add them in the Collective Album on my Facebook page !
(one lucky winner will receive a Tulip Etimo Rose hook once the project is finished)

See you next week to share our conclusions on the stitches from this Episode !

********************
DC project Episode 1
DC project Episode 2
DC project Episode 3
DC project Episode 4
DC project Episode 5
DC project Episode 6
 

TestClover TestAddi

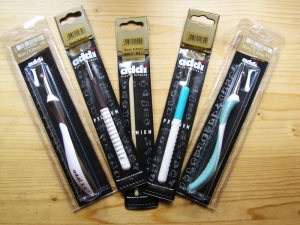
Coming soon: An in-depth test of all the best crochet hooks on the market. So far, Clover, Addi and Tulip kindly sent me samples to test. More might follow soon…

Those will also be at your disposal to test during all the fairs and yarn festivals I’ll attend (next date – March 20th in St Bŕ©ron, France), as there is no such thing as being able to test a hook by yourself and see how if fits with YOUR way of crocheting.

TestNath TestTulip2

To make the test as full and objective as possible, I’ve prepared a detailed questionary which I’ll send along with hooks to test to 3 of my crocheting friends who have different and complementary profiles:

– L. is left-handed and has fragile wrists
– S. suffers from a sickness which makes her joints hyper sensitive. She’s thus very picky about ergonomic handles on her hooks
– N. is right-handed but holds her hooks quite differently from me, and therefore doesn’t always like the same things as I do.

Oh, and plus me: right-handed, knifer.

TestTulip3 Preview2ENG

We’ll try and focus on a series of precise criteria, such as
– quick and/or precise head
– comfort of the handle
– price
– and aestetics too ;-)

I can’t wait !

Crochet cables - DC project by Sylvie Damey
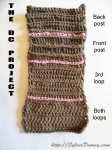
Last week I mentionned crocheted CABLES as being the most common use of the Front/Back post double crochet. Crocheted cables ? What ? How do you do that ?
How about we take a closer look…

For this episode we’ll use both dc in both loops and Front post/Back post dc.

Our goal: take advantage of the relied and added texture of the front/back post dc to create an elevated vertical stripe in the center of the swatch.
Then we’ll simply cross the Front post dc every 4th row to create the cable. Just as knitters do !

Ready ? Let’s start with a very basic CABLE over 2 STITCHES. Just so we understand the moves and technique.

I’ll keep the same yarn and hook as for the other episodes of this DC project: Rowan “all seasons cotton”, and my usual 5 mm Susan Bates hook.

Dc1ENGLISH
Let’s start with a foundation chain of 22 chains (= 22 ch).
Insert hook in 4th chain after hook, and work your first dc. Continuer and work 1 dc in each next chain. Turn. You have 20 sts, counting the first ch3 as first st.

1 2
Next, work as follows:
Row 1 (Right Side) – ch3, 8 dc in both loops, 2 front post dc, 9 dc in both loops.

Row 2 (Wrong Side) – ch3, 8 dc in both loops, 2 back post dc, 9 dc in both loops.

3

When looking at RS of work, you can see the center vertical stripe which pops.. and will become a cable in the coming rows.

Now, let’s cross the front/back post dc to create the cabled effect.

Row 3 (RS) -ch3, 8 dc in both loops, skip 1 stitch, 1 Front post dc in next st, come back to skipped st and work 1 Front post dc in skipped st, end with 9 dc in both loops.

which you could break up into photographs below:
4 5

Skip 1 st, insert hook around post of next st..

6 7

You can already see the first crossed stitch of the cable – Then insert hook for the 2nd crossed st…

8

And now here are the 2 center crossed sts. It doesn’t quite look like a cable yet, but it will pop more as soon as we work more “plain” rows…

Now let’s continue with 3 rows without crossing sts:
Row 4 (WS) – ch3, 8 dc in both loops, 2 back post dc, 9 dc in both loops.
Row 5 (RS) – ch3, 8 dc in both loops, 2 front post dc, 9 dc in both loops.
Row 6 (WS) – ch3, 8 dc in both loops, 2 back post dc, 9 dc in both loops.

10

And Bam ! Suddenly we can clearly see our narrow cable in the center of the swatch (still looking on RS).

Now you only need to repeat this 4-rows sequence to make a longer cable.

However… as can clearly be seen on this swatch, the front/back post dc AND crossed stitches tend to crush the work vertically along the cable area. Not so nice.

So how about we try a SECOND CABLE, but this time worked over 4 STITCHES. This time our cable will include a mix of front/back post DOUBLE and TREBLE CROCHETS, so that we maintain an even height between cable and rest of swatch.

DoubleCable

We’re still using the same 20 sts swatch.

Row 1 (RS): ch3, 7 dc in both loops, 4 front post TREBLE crochets, 8 dc in both loops. Turn.

Row 2 (WS): ch3, 7 dc in both loops, 4 back post DOUBLE crochets, 8 dc in both loops. Turn.

Row 3 (Endroit): Crossing sts – ch3, 7 dc in both loops, skip 2 sts, 1 front post TREBLE crochet in each of the next 2 sts, then come back to the skipped sts, and work 1 front post TREBLE crochet in first skipped st, and 1 in next skipped st, end with 8 dc in both loops. Turn.

Row 4 (WS): repeat row 2.

And repeat this 4-rows as long as desired to crochet your cable…

FiniENGL

Separate both sections of cable with a line in surface crochet. Sit back and imagine all the possibilities… Cables on the side of a hat, on a pair of mittens…

Relief Back

When looking sideways, you can clearly see the center cable stitches pop. But on the wrong side ? Not so pretty…

And now, how about playing with cables and experiment: add more stitches, try different heights of stitches (I’ll certainly try cables in a swatch crocheted in dc in the front loop !)
Share your photos and experiments so I can add them on the Facebook album !

*********************************************************************************************************************************************
How about YOU ? Anything I forgot or didn’t see in those swatches ? Please share in the comments !
*********************************************************************************************************************************************
DC project Episode 1
DC project Episode 2
DC project Episode 3
DC project Episode 4
DC project Episode 5

2 1

Two amazing ladies came to my corner of the Alps to learn how to crochet a sweater or cardigan without a pattern during 2 days of crochet workshop. We started with having a look at the 20 pages document I gave them, choosing the style of garment they wanted (sweater or cardigan, short or long sleeves, boxy, empire waist or fitted waist…)

3
Started with the yoke as we’re working top down in one piece.

4 6

The key to this method is to try the sweater on yourself again and again, so that it ends up fitting YOU just perfectly. No fiddly measurements or complicated math and calculations… Just a clever arrangment of increases for the yoke and easy system to divide your sleeves.
By the end of the first day, both crocheters were ready to divide the body and sleeves.. or had already finished the top part of the bodice.

8 9recut

On the second day, we then focused on working the lower section of body to bust and waist shaping…

11 15r

Discovering the million usefull ways to use stitch markers, or how to add character to a plain sweater with pretty finishing touches…

25 22

Learning new lace motifs… At the end of the second day, both sweaters already look amazing ! The crocheters have all the tools and notes to finish them at home. And with one already started on her sleeve, while the second one finished her edgings, they’ve both seen many techniques in action during the workshop.

26

Icing on the cake – love that review from one of the crocheters:

“Thrilled by this 2-day parenthesis away from the busy routine! As a beginner crocheter (been crocheting for a year, and left-handed !) I learned a lot of techniques. This workshop is a door opener to “allow yourself” to combine your knowledge, invent and create with crochet. Sylvie is certainly full of imagination and suggestions in this area !”

“Enchantŕ©e de ces deux jours de parenthŕ¨se hors du monde ! Beaucoup de techniques apprises pour la dŕ©butante que je suis (un an de crochet ŕ  mon actif et gauchŕ¨re de surcroŕ®t !…).
Ce stage est un sŕ©same pour “s’autoriser” ŕ  associer des connaissances, inventer et crŕ©er au crochet. Sylvie ne manque pas d’imagination et de pistes dans ce domaine !”

PS – In love with that orange and plum yarn ? So am I.
It’s available here and on sale too !

chezplum.com - patterns design - © Sylvie Damey
 

Page created in 0.426 seconds and powered by WordPress