Blog

Are your wrists sometimes sore from crocheting ?
You inherited a collection of old plain hooks  and now you’re dreaming of enhancing your stash with pretty colorful hooks ?
Or maybe the yarn sometimes snag into the head of the hook, and you wonder whether you could find more efficient/precise hooks ?

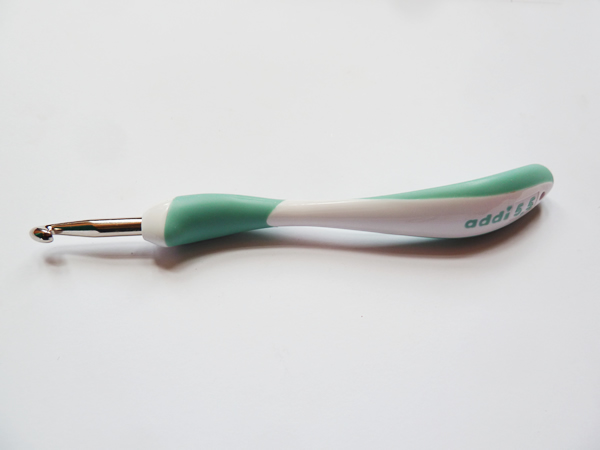
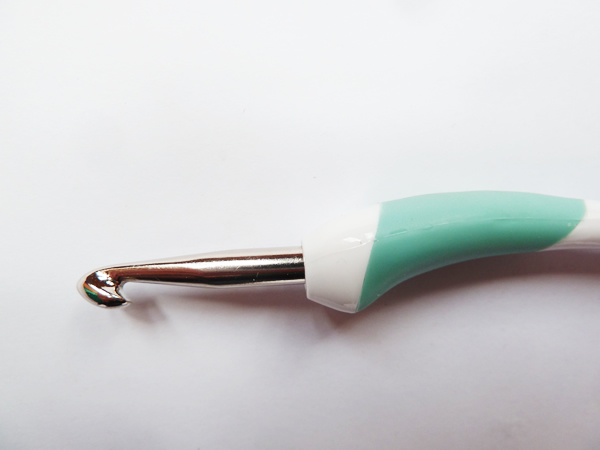
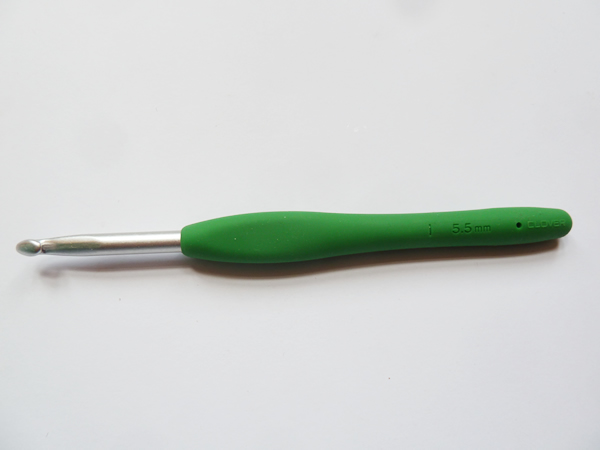
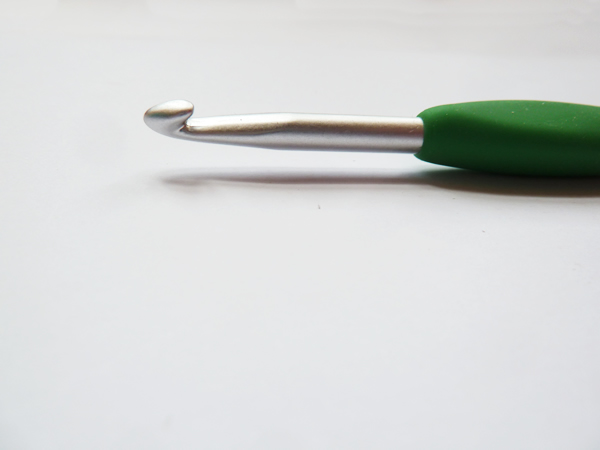
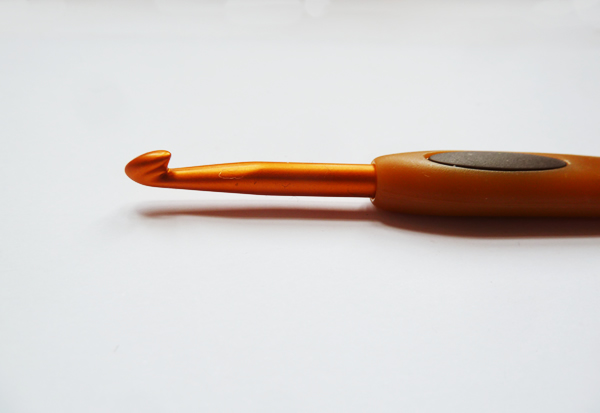
Last weeks we started to review 5 different brands and types of crochet hooks and ergonomic hooks: ADDI swing and colors, CLOVER soft-touch and amour, KNITPRO waves, and I shared the results of my tests along with 2 fellow crocheters to make the review more objective and thorough.

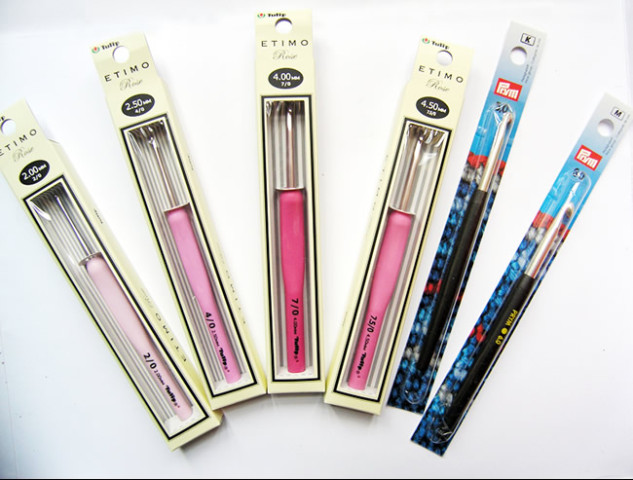
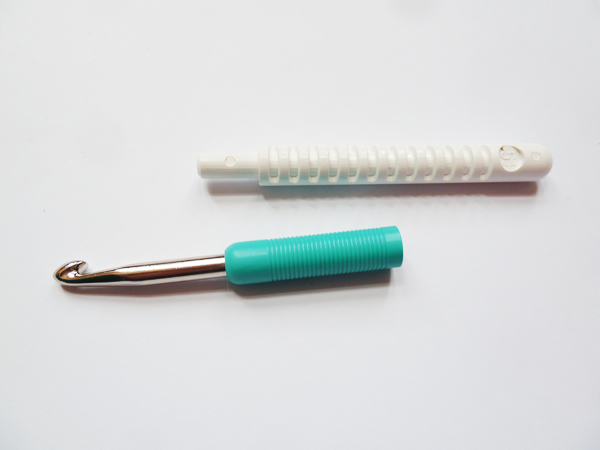
Then we tested more hooks, with the PRYM soft and ergonomics, TULIP ETIMO rose, SUSAN BATES silvalume .

Deepest thanks to all the brands who generously sent hooks for us to test (with no influence on our results): ADDI crochet hooks- PRYM crochet hooks – CLOVER crochet hooks – JIMBO’s front porch  crochet hooks – TULIP ETIMO crochet hooks

First, here’s a reminder of the specifis of all 3 crocheters who shared their opinions in this test, along with some info on each of us:

 
1/ ConfitureAlaMure, crochet designer and crochet teacher: ” I suffer from rheumatoid arthritis. Crocheting helps me start moving around in the morning.
I’m a thwarted left-hander.  I learned to crochet with my right hand, but it’s my left hand with bring the yarn and stitches under the hook. My right hand hardly moves in the end.
The comfort of the handle is my own most important criteria in choosing a hook. I will always prefer a comfortable grip of the handle over a super precise head. I don’t really mind unraveling a stitch that wasn’t caught right, but I need to have a good hold of my hook. And if it’s pretty, that’s even better.
However, I always pay attention to adapting the right hook to the fiber I’m using. I will only use bamboo hooks for mohair or lace, nver for cotton or wool. To crochet with cotton yarns, you definitively need a hook with a steel shaft, or it’s just impossible. Cotton needs to glide over the hook, when mohair needs to be held back “
 ****************************************************************************************************
 
2/ Lu. – “Left-hander, suffering from osteoarthristis and issues with her thumbs and wrists, she started to crochet 2 years ago (..) and favors especially bamboo, wood and ergonomic handles. “
  ****************************************************************************************************

3/ And me… Sylvie Damey. – “Left-hander, holding my hook with a knife grip. No real joint issues, yet sometimes my wrists feel a bit rusty. In those cases, I’ll try to alternate the “working hand” even though my hook always remain in the right hand.
I crochet mostly sweaters, and as such, I’m always looking for speed and efficiency. If the yarn tends to snag or if I have to pull each loop through one-by-one, I just loose patience instantly !
My most important criteria on a hook is thus the precision and efficiency of the head of the hook. All the rest comes after.

 ****************************************************************************************************
And now, here’s what we felt while trying each of those hooks… This time, we’re reviewing JIMBO’s front porch hooks + the FURLS odyssey & candy shop +
 *********************************

Jimbo1 Jimbo2

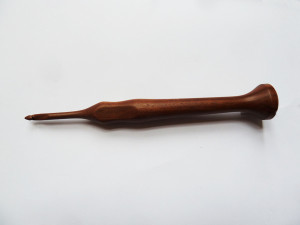
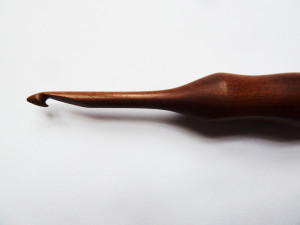
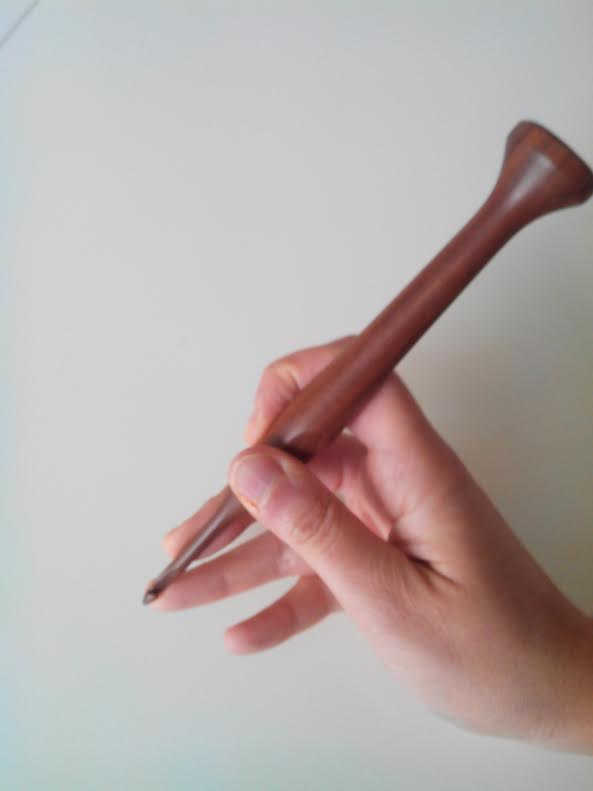
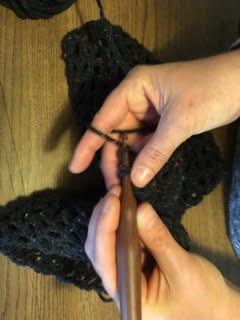
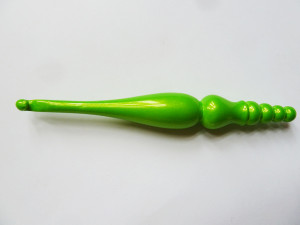
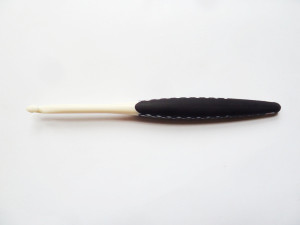
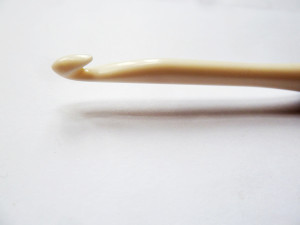
Crochet hook JIMBO’s front porch hook

TECH: Each hook made by Jimbo is made of wood and ENTIRELY sculpted by hand. He usually picks pieces of wood on his property and hand carves a hook out of it. I highly encourage you to read about his process and all the work involved on his blog.

Weight of a 5 mm hook: 25.6 grams

Length: 18.4 cm

Average price: between $30 and $60, as they are auctionned on Jimbo’s blog


Pros:

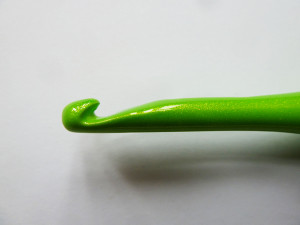
1/ Beautiful hook and an impressive head ! So happy I discoved this hook

2/ Most excellent. Amazing lightness and grip in the hand, perfect hold of the yarn. I was expecting it to be heavy but the handle is very light, and thick. This is surprisingly super confortable especially for somebody who has arthritis. I love this hook which would definitively by my everyday crochet hook wasn’t it for the high price !

3/ An incredibly precise and efficient head. The handle is perfect with the ultimate thumb-rest. This hook is even more amazing when you know it was made all by hand…

Cons:
1/ The handle is too big and the hook stand at its end unbalances slightly the hand. It’s really too bad because otherwise it’s really great to hold in your hand. The effort towards perfect esthetics took away some of the comfort…

2/ The price takes away all my desires to buy one..

3/ The stand at the end of the handle is a bit heavy and feels like it unbalances th ehook. It’s a shame because it would be just perfect otherwise. (but Jimbo is so nice he was very keen to hear what we thought, and might change that on future hooks..)

In ONE word this hook is:
A very beautiful object – A must – Amazing

*********************************

 FurlsOdyssey1 FurlsOdyssey2

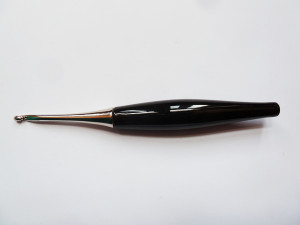
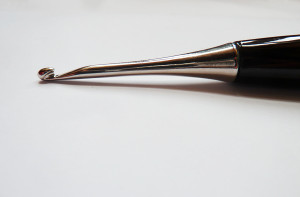
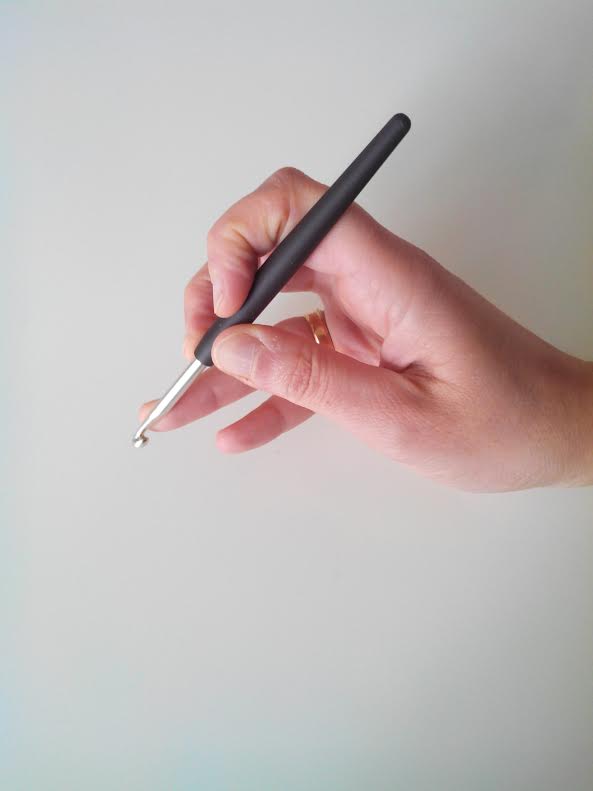
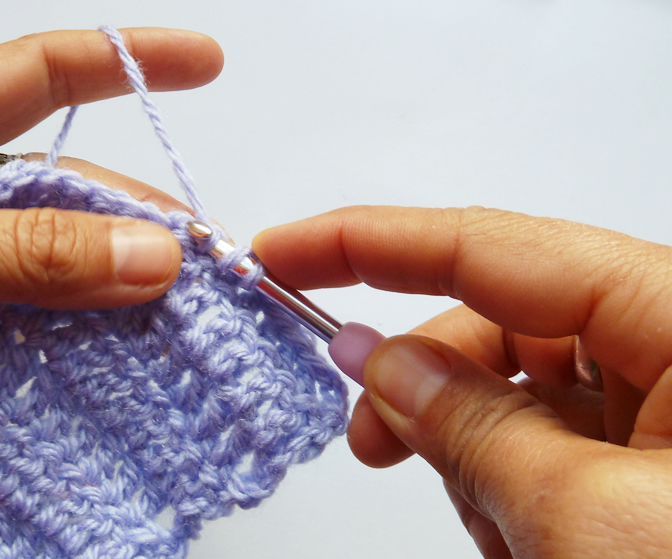
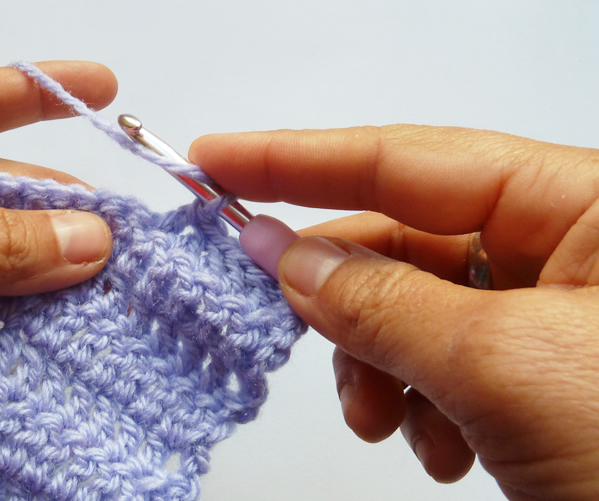
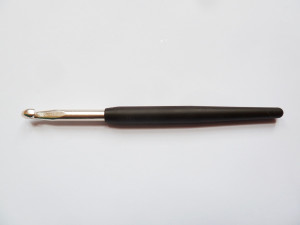
Crochet hook FURLS odyssey

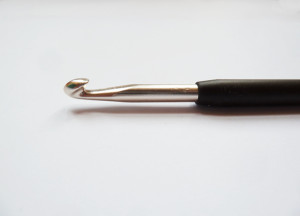
TECH: head and shank in metal. Handle is in slick resin, looking like piano keys, very elegant.

Weight of a 5 mm hook: 36.7 grams

Length: 17 cm

Price: 30 $ + shipping from the US

Pros:
1/ Hem… it’s pretty ^^ Metal glides well.
2/ Decent grip of the yarn
3/ It’s a beautiful object and crochets nearly without any glitch (and I’m picky!). Crocheting with this hook is for me like a moment of pure bliss, appreciating each and every stitch I make with it.

Cons:

1/ I don’t like the fact that the groove is very shallow, with hardly any lip to hold the yarn. The shank gets wider as it meets the handle. It’s pretty but doesn’t help keeping even stitches. The weight of this hook is unbelievable (so heavy!). So dissapointing, I would have loved to love it…
2/ The looks, the price and the heavy weight of its handle.
3/ It’s a bit heavy. I made a sunhat with it, but I’m not too sure I could crochet a full sweater because of how heavy it is. Also, it’s expensive, esp. with shipping from the US when you live in Europe.  AND my gauge is looser when I crochet with it. When I measure the shank with my hook-gauge, both my Odyssey hooks seem about 5 mm above their stated size. I read somewhere a lady had the same issue. Is is because of the design of those hooks, or a problem with their sizing ?
In ONE word this hook is:
Both pretty and dumb ! – Dissapointing – Beautiful

*********************************

Finally, I was the lucky winner of a hook on Moogly’s blog a few weeks ago. It was too late to include it with the other hooks for my fellow testers, but here’s already my own thoughts on it:

FurlsCandyShop1FurlsCandyShop2


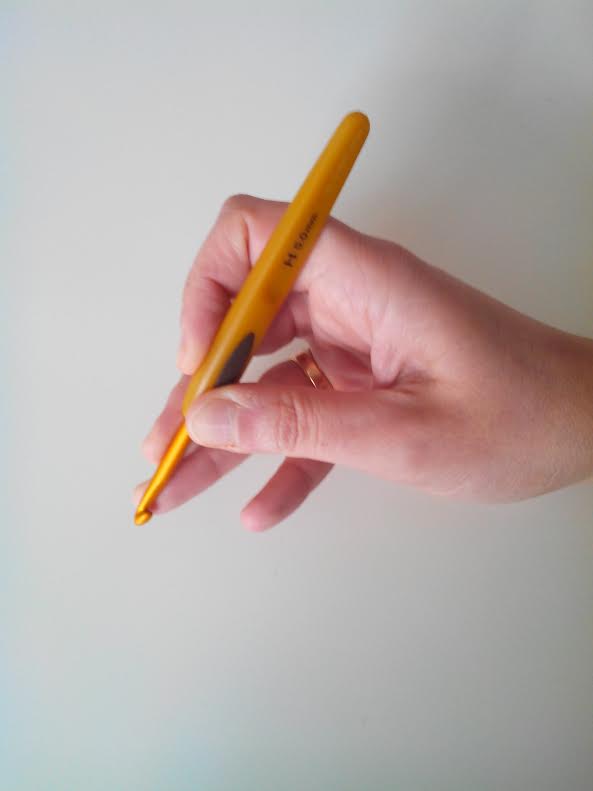
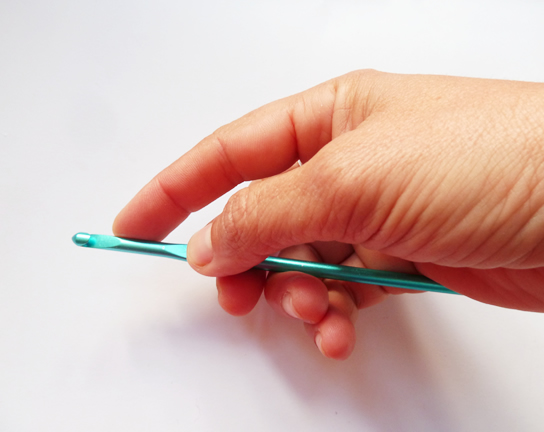
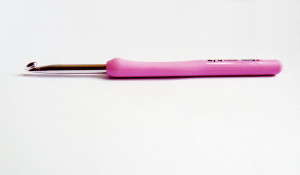
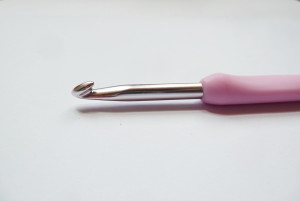
Crochet hook FURLS candy shop

TECH: This hook is made of resin, with several coats of glitter paint on top. Each size of hook is a slightly different design and a different color.

Weight of a 6 mm hook: 19.2 grams

Length: 14 cm

Average price: $50 + shipping from the US


Pros:

Despite its flat head which looked scary at first (I feared it would not poke through stitches properly), it crochets rather smoothly. The handle is short, with a large “tummy” which rests nicely inside my palm as I hold it as a knife.

Cons:
The price !! 50$ for a hook made out of resin sounds out of proportions to me. And the tiny flimsy box it was sent into looked a bit cheap, would certainly would be dissapointed if I had bought it at this price.

In ONE word this hook is:
Cute but outrageously expensive!

*********************************


+ read also: 

Test of the  PRYM Soft & Ergonomics, TULIP ETIMO Rose, SUSAN BATES Silvalume crochet hooks

Test of the high-end FURLS Odyssey, Candy shop crochet hooks, JIMBO’s front porch hooks

+ Coming soon:

Anatomy of a crochet hook, and criteria to take into account when choosing the right hook for YOU

Yes, I’d love to hear about Sylvie Damey’s next articles & patterns !


Are your wrists sometimes sore from crocheting ?
You inherited a collection of old plain hooks  and now you’re dreaming of enhancing your stash with pretty colorful hooks ?
Or maybe the yarn sometimes snag into the head of the hook, and you wonder whether you could find more efficient/precise hooks ?

Last week we started to review 5 different brands and types of crochet hooks and ergonomic hooks: ADDI swing and colors, CLOVER soft-touch and amour, KNITPRO waves, and I shared the results of my tests along with 2 fellow crocheters to make the review more objective and thorough.


Deepest thanks to all the brands who generously sent hooks for us to test (with no influence on our results): ADDI crochet hooks- PRYM crochet hooks – CLOVER crochet hooks – JIMBO’s front porch  crochet hooks – TULIP ETIMO crochet hooks

First, here’s a reminder of the specifis of all 3 crocheters who shared their opinions in this test, along with some info on each of us:

 
1/ ConfitureAlaMure, crochet designer and crochet teacher: ” I suffer from rheumatoid arthritis. Crocheting helps me start moving around in the morning.
I’m a thwarted left-hander.  I learned to crochet with my right hand, but it’s my left hand with bring the yarn and stitches under the hook. My right hand hardly moves in the end.
The comfort of the handle is my own most important criteria in choosing a hook. I will always prefer a comfortable grip of the handle over a super precise head. I don’t really mind unraveling a stitch that wasn’t caught right, but I need to have a good hold of my hook. And if it’s pretty, that’s even better.
However, I always pay attention to adapting the right hook to the fiber I’m using. I will only use bamboo hooks for mohair or lace, nver for cotton or wool. To crochet with cotton yarns, you definitively need a hook with a steel shaft, or it’s just impossible. Cotton needs to glide over the hook, when mohair needs to be held back “
 ****************************************************************************************************
 
2/ Lu. – “Left-hander, suffering from osteoarthristis and issues with her thumbs and wrists, she started to crochet 2 years ago (..) and favors especially bamboo, wood and ergonomic handles. “
  ****************************************************************************************************

3/ And me… Sylvie Damey. – “Left-hander, holding my hook with a knife grip. No real joint issues, yet sometimes my wrists feel a bit rusty. In those cases, I’ll try to alternate the “working hand” even though my hook always remain in the right hand.
I crochet mostly sweaters, and as such, I’m always looking for speed and efficiency. If the yarn tends to snag or if I have to pull each loop through one-by-one, I just loose patience instantly !
My most important criteria on a hook is thus the precision and efficiency of the head of the hook. All the rest comes after.

 ****************************************************************************************************
And now, here’s what we felt while trying each of those hooks… This time, we’re reviewing the PRYM soft and ergonomics, TULIP ETIMO rose, SUSAN BATES silvalume. (to be continued next week !)
 *********************************
PrymSoft1 PrymSoft2

Crochet hook PRYM soft

TECH: 

Metal head, handle made of some sort of compact man-made foam material. Sizes written only in metric, in either red or yellow depending on size.

Weight of a 5 mm hook: 

Length: 13.8 cm

Average price in France: 2,95 €

Pros:
1/ A very pretty hook. The shank is the perfect length. I like the sober black look.
2/ A lightweight crochet hook.
3/A good compromise, cheap with an efficient head. 

Cons:

1/ The handle is not at all ergonomic. The material of the handle is too hard to have a good grip. The fact that there is not enough “drop” between the handle and shank hurts my fingers.
2/ The head is not very efficient and doesn’t hold the yarn inside the groove well. The so-called ergonomic hook offers no comfort.
3/ Some sizes do no exist, there is no 5.5 mm hook ! I totally need this size and use it very often, so this is a problem for me.
In ONE word this hook is:
Pretty – Not very efficient  A good basic hook

*********************************


PrymErgonomics1 PrymErgonomics2

Crochet hook PRYM Ergonomics

TECH: 

This hook is completely made of hard plastic, with grip material around handle. Only exists in large sizes, from 6 mm to 15 mm.

Weight of a 5 mm hook: 

Length: 17 cm

Average price in France: 4,39 to 6,75 € depending on sizes


Pros:

– A super light hook, and plastic material from head to shank which glides perfectly. The handle is comfortable, the head is precise.
– A surprising hook despite an unattractive look. A little difficult to insert through fibers but very good catch of the yarn in the groove, very comfortable and light, smooth.
– I was amazed to see how precise and efficient it is for a plastic hook ! The shape is really surprising with its long “neck”, yet it’s really comfortable to hold.

Cons:
– They could make an effort on the colors…
– Entirely made of plastic !
– Its plastic feel doesn’t do it justice. Also, only exists in larger sizes (which can also be a good point if you crochet with super bulky yarns).

In ONE word this hook is:
Surprising! – Comfortable  Great


*********************************

TulipEtimo TulipEtimo2


Crochet hook TULIP ETIMO Rose

TECH: 

Metal head, handle in super compact plastic/foam material. Sizes written in japanese and metric sizes. In this set, handles are each a different tone of pink depening on size. (also exists in a more gender-neutral version with yellow metal shanks and dark grey handles)

Weight of a 5 mm hook: 

Length: 14.2 cm

Average price in France: 7,80 €

Pros:
1/ Excellent grip, I really like the thumb-rest which holds the hook perfectly in place.
2/ Very smooth, glides very well, very precise, I love it ! The ergonomic handle stays perfectly in my hand and it’s lightweight. Despite being no fan of plastic, I’m pleasantly surprised by the very soft feel of this handle. The flat section for thumb rest seemed to flat at first, but it’s actually super comfortable especially when I have arthritis. I really like it and will spread the word!
3/ This was a discovery. A hook which is altogether pretty, girly (even a tad too girly with the pink needle case and golden scissors), super precise and efficient, and with a really good handle that’s easy to hold. I really love the thumb rest, so comfortable.

Cons:

1/ I don’t like that the brand “Tulip Japan” is printed in relief at the back of the handle. It irritates my fingers and annoys me. I also don’t care much for the sort of printed tape with the hook size, it ruins the esteatics of the hook and my fingers are itching to take it off.
2/ This hook is a bit expensive.
3/ It’s a rather expensive hook, especially if you buy the whole set. It’s a bit of an investment. And they’re slightly less efficient than the Susan Bates and their inline head. Not too far, but still (remember, I’m so picky about this!)
In ONE word this hook is:
Pink – Excellent  Superb and efficient

*********************************

SusanBates1 SusanBates2


Crochet SUSAN BATES Silvalume

TECH: 

Crochet made of aluminium, in different colors depending on size. Has a typical inline head.

Weight of a 5 mm hook: 

Length: 14 cm

Average price in France: Only place it’s sold in France is my Etsy shop, for 4,16 € when sold as a set.

Pros:
1/ The head is amazingly precise. Of course it’s super light as it doesn’t have any ergonomic handle. I really like the vivid colors. I have to admit that on larger sizes (above 5 mm) I feel more at ease with a Susan Bates than a Clover Amour, especially regarding the weight.
2/ Really very precise and glides nicely through fibers, cheap and light. This is the most precise hook thanks to its sharp-cut head. Formidably efficient ! If only it had an ergonomic handle it would be my favorite hook.
3/ For me this is THE ultimate crochet hook, because it’s so incredibly fast and efficient with the inline head (more about this in a next episode regarding the Anatomy of a crochet hook). No ergonomic handle, but a perfect thumb-rest. And because it’s SO precise, there’s no need to grip it firmly, thus occasioning me no pain. The price is also very reasonable for such a quality hook.

Cons:
1/ I regret the absence of ergonomic handle. Such an amazing head with the handle of the Amour and I’d be the queen of the universe.
2/ Unfortunately this hook causes me pain in the long term when I have reumatism, because of the thin handle.
3/ It looks deceptively plain. Most people would not suspect how amazing it actually is.. ;-)
In ONE word this hook is:
Efficient – Impressive  A MUST

Buy a pack of 6 Susan Bates Silvalume crochet hooks in my Etsy store


******************************

+ read also: 

Test of the  PRYM Soft & Ergonomics, TULIP ETIMO Rose, SUSAN BATES Silvalume crochet hooks

+ Coming soon:

Test of the high-end FURLS Odyssey, Candy shop crochet hooks, JIMBO’s front porch hooks

Anatomy of a crochet hook, and criteria to take into account when choosing the right hook for YOU

Yes, I’d love to hear about Sylvie Damey’s next articles & patterns !


Are your wrists sometimes sore from crocheting ?
You inherited a collection of old plain hooks  and now you’re dreaming of enhancing your stash with pretty colorful hooks ?
Or maybe the yarn sometimes snag into the head of the hook, and you wonder whether you could find more efficient/precise hooks ?

Crocheting is now my full-time job and as such, I’ve long been wondering about the perfect hook: would it necessarily involve an ergonomic handle, what are the possible differences between all the various hooks… and is there even such thing as a perfect hook ?

I did have a personal favorite, but wanted to take this opportunity to try all the best hooks on the market. Yet, no review would be complete with ONLY my own opinion, as all crocheters crochet different things (amigurumis/mandalas/sweaters/lace shawls..), hold their hook differently, have health issues that influence the type of hooks they need…

Deepest thanks to all the brands who generously sent hooks for us to test (with no influence on our results): ADDI crochet hooks- PRYM crochet hooks – CLOVER crochet hooks – JIMBO’s front porch  crochet hooks – TULIP ETIMO crochet hooks


So I invited 2 friends to test the hooks along with me. You’ll find our opinions in the same order throughout all the test.
Here’s some info on each of us:


1/ ConfitureAlaMure, crochet designer and crochet teacher: ” I suffer from rheumatoid arthritis. Crocheting helps me start moving around in the morning.
I’m a thwarted left-hander.  I learned to crochet with my right hand, but it’s my left hand with bring the yarn and stitches under the hook. My right hand hardly moves in the end.
The comfort of the handle is my own most important criteria in choosing a hook. I will always prefer a comfortable grip of the handle over a super precise head. I don’t really mind unraveling a stitch that wasn’t caught right, but I need to have a good hold of my hook. And if it’s pretty, that’s even better.
However, I always pay attention to adapting the right hook to the fiber I’m using. I will only use bamboo hooks for mohair or lace, nver for cotton or wool. To crochet with cotton yarns, you definitively need a hook with a steel shaft, or it’s just impossible. Cotton needs to glide over the hook, when mohair needs to be held back “
 ****************************************************************************************************
 
2/ Lu. – “Left-hander, suffering from osteoarthristis and issues with her thumbs and wrists, she started to crochet 2 years ago (..) and favors especially bamboo, wood and ergonomic handles. “
  ****************************************************************************************************

3/ And me… Sylvie Damey. – “Left-hander, holding my hook with a knife grip. No real joint issues, yet sometimes my wrists feel a bit rusty. In those cases, I’ll try to alternate the “working hand” even though my hook always remain in the right hand.
I crochet mostly sweaters, and as such, I’m always looking for speed and efficiency. If the yarn tends to snag or if I have to pull each loop through one-by-one, I just loose patience instantly !
My most important criteria on a hook is thus the precision and efficiency of the head of the hook. All the rest comes after.


 ****************************************************************************************************
And now, here’s what we felt while trying each of those hooks… starting with the ADDI swing, ADDIcolors, CLOVER soft touch, CLOVER amour and KNITPRO waves hooks so this blog can remain a reasonnable size (to be continued next week !)
*********************************


Crochet hook ADDIcolors

Tech: 
metal shaft, plastic handle with different colors for each size.  Metric size written on each hook.
Weight of a 5.5 mm hook: 12 grams
Length: 15.5 cm
Average price in France: 4.50 €  (may differ considerably depending on countries)
Pros
– The shank is the exact perfect size to fit several sizes, no issues to crochet a bobble or bullion stitch.
– Head of hook is precise and efficient enough
– Affordable hook. And I love the fact that it comes apart, so much fun ! When travelling, you could take with you only one “handle” + all the “heads”…
Cons
– The handle is very thick and too round. It looks cheap. The grooves on the handle are annoying and leave marks on my fingers.
– The looks of this hook is uninspired. The handle is located too far away from the head, which isn’t great in terms of comfort.
– The head is not efficient, and it just doesn’t glide well when using cotton yarn. The color of my most-commonly used hook (5 mm-H) is an ugly dark brown. Yikes !

In ONE word this hook is:
Not pretty – Uninspired – Fun to dismantle & handy for travelling

*********************************


Crochet hook ADDI Swing

Tech: Metal shaft , plastic handle. Handle is S-shaped, with a very marked thumb-rest. Colors differ depening on size. Metric size written on each hook.

Weight of a  5.5 mm hook:  16 g
Length: 15.5 cm
Average price in France: 6.95 €  (may differ considerably depending on countries)
 
Pros:
1/ Good effort made on the look of this hook, which totally differs from all the others. I like the idea of one color for each size of hooks, makes it easier to find the one you’re looking for. The stitches glide well on the metal shaft.
2/ Inspired look.
3/ The handle is really surprising, so similar to my toothbrush, but it stays balanced in my hand even without holding it. I really like the feeling…!
Cons:
1/ The handle is not fit for my hand, it’s annoying rather than helping. The shank is too short, I cannot fit enough stitches there: barely enough for a bobble, but it’s just impossible to make a bullion stitch with it.
2/ Not very comfortable to use, the handle is too heavy.
3/ The head keeps snagging on the loops of my double crochets, really annoying.
In ONE word this hook is: 
Interesting, but not for me – Dissapointing – Super ergonomic
*********************************


Crochet hook CLOVER Amour

Tech: metal shaft, handle made of some sort of plasticy foam material.  Handle is rounded with large flat thumb rest top, and of a different color for each size. Metric & American size written on each hook.

Weight of a 5.5 mm hook: 9 grams
Length – 13.2 cm
Average price in France: 6.60 €  (may differ considerably depending on countries) 


Pros:
1/ My babies… Needless to say that since I discovered those, they’re the only ones I crochet with. Only downside is that they become heavier with each larger size. But for cotton with a 3.5 mm hook, it’s pure bliss. And I love the colors !
2/ Very nice feeling of the handle material, good grip.
3/ A very efficient hook, with a nice grip. This is a hook I could use to crochet a full sweater. And the full set is so cute, with different (and pretty) colors for each size.
Cons:
1/Ahem… can’t find any.
2/ I prefer the feel of the handle of the Soft Touch to those.
3/ If I’m being super picky, the head sometimes snags on a stitch. But this is really to try and find something negative to say about them.. ;-)
In ONE WORD this hook is: 
Perfcct – My precious (for somebody with arthritis) – A very good hook


*********************************


 Crochet CLOVER Soft touch

Tech: Metal shaft, hard plastic handle with “cushion” on thumb rest. Handle is flat. Colors remain identical for all sizes. Metric & American size written on each hook.

Weight of a 5.5 mm hook: 6 grams
Length: 13.2 cm
Average price in France: 4.15 €  (may differ considerably depending on countries)
Pros:
1/ This was the first ergonomic hook I ever used about 10 years ago, so it remains dear to me. I love the metal used, the color, the sound of it when you crochet. The size of the shaft is just perfect.
2/ It’s one of my favorite hooks. The coating of the shaft gives it exceptional glide.
3/ Rather efficient for a cheap price.
 
Cons:
1/ Revolutionary 10 years ago, but I’ve since found much better. I’ll admit the very hard plastic material used on the hand glides on your hands, so you loose a little precision.
2/ Dull color, the feel of the hard plastic handle.
3/ The handle is too short for my hands. It hits right in the back of my palm, and I don’t like the feeling, especially with the hard plastic used. I really don’t like the colors of this hook.
In ONE word this hook is: 
Good memories – Efficient- Too short
*********************************


Crochet hook KNITPRO Waves


Tech: Metal shaft, handle in hard plastic, slightly flat. Handle is a different color for each size. Metric size written on each hook.
Weight of a 5.5 mm hook: 6 grams
Length: 14 cm
Average price in France: 3 €  (may differ considerably depending on countries)
Pros:
1/ The price/quality ratio is hard to beat with these hooks which are quite similar to the Amour hooks. I always recommend those to my beginner students.
2/ A small light-weight hook
3/ It’s one of the cheapest hooks on the market among ergonomic hooks. It’s lightweight and the handls are each a different pretty color.
 
Cons:
1/ The materials used look a bit
2/ Not very precise or efficient
3/ I keep trying it, but I cannot like it. The stitches keep snagging and it makes me mad.
 
In ONE word this hook is:
Versatile and cheap – Lightweight – Not for me !
******************************
+ Coming up next week: 
  • Test of more ergonomic hooks – PRYM Soft & Ergonomics, TULIP ETIMO Rose, SUSAN BATES Silvalume
  • Test of high-end crochet hooks – FURLS Odyssey & Candy shop, JIMBO’s front porch hooks

Yes, I’d love to hear about Sylvie Damey’s next articles & patterns !


This morning I stumbled upon something that may well change my vision of myself ! I’m so excited.

Time to share a few things about me… and maybe you’ll learn a few things about yourself too ?

MultiPassionateENGLISH

I’ve been designing crochet patterns for over 10 years now, and I’m quite passionate about all things related to WOOL: spinning, felting, dying.. and even sewing. But you probably already know that.

However, narrowing my personal interests to those items would not reflect the truth. There are many other things I’m super curious about and fascinated by (as those who follow me on Facebook already probably suspect...)

I am deeply touched by everything involving Recycling (I even worked at spreading the word about the new recycling bins at some point), Nature and DIY in general.
I love to camp, cook bread on a firecamp, feel the trees and the wind around me.
I dream of the day we have a house with a large orchard, and can grow our own fruits and veggies.

I’m always curious to learn more about sustainable living: how to make my own clothes, my own cleaning and beauty products, grow my own food… and ideally hardly ever needing to go to a supermarket any more !

Being french, I’m also fascinated by the english language and culture of anglo-saxon countries. So much so that I actually blog in english this very minute, and get to share every days with like-minded friends living at the other end of the world.. That I ended up working professionally as a translator of knitting and crochet patterns ! And that I spent 3 years travelling and working in all those countries I knew I’d love (US & Alaska, New Zealand and Australia..

But that’s not all. To me, managing a creative business is not a chore, it’s something I LOVE ! The first time I realized this, I was in Perth, Australia, and published ads in the local newspaper to do garderning and housekeeping. After a few weeks into it, I realised that I was having the time of my life finding new customers, booking appointments, deciding on what hourly rate to ask, or even which services I would be best at (let’s say I’m still not very good at gardening !). Even now, I love researching about marketing and creative business, and love it even more when I can translate what I’ve learnt into content that actually resonnates both with the readers AND my inner self. That’s the ultimate beauty of being in charge of your own business…

And on top of all that…

Of course like every body else, I also have tons of personal interests. I’ve always been an avid reader. I love all things related to India or Bollywood-style dancing. A few years ago, I discovered contemporary dance and it was a shock, to see how deep this resonates inside me. I’m also known for knowing everything about our local recycling centers…

Anyways.

During my school years, one of the hardest things was to choose. I just happened to love every field ! When it got time to decide on a major for University, I just couldn’t. Instead, I looked at all the different options, and chose a diploma which would allow me to keep as many different fields as I could: foreign languages + culture of anglo-saxon countries + economics and history + math (to which I added economics of sports, to include the Ski resorts I loved to hang out around in my studies..)

Once the time came to choose my career path, it didn’t get any easier. I started to do odd jobs in various directions: selling ski passes both in France and NZ, full-time mom, occasional translator on large professional events, creative writer and translator for various websites, webmaster of a large tourism website + writer of all the content of this site… plus a number of temp jobs.


Yet, at the same time I started to publish my own patterns, quite confidentially at first. Then I got more and more serious about it.. and the few small translation jobs I’d do for fellow knitters turned into full-on translations for book editors and yarn companies. So much so that all this has now turned into my “day-job”.

But every time somebody asks what do I do for a living.. I feel somehow embarrassed, and will reply depending on the situation that “I’m a translator”, or that “I’m a translator and… (insert small blank here) also design and sell my own crochet patterns”..

And then BAM !

Today this video was a huge revelation: Emilie Wapnick, “Why some of us don’t have one true calling” ?  

This feels so spot on. YES ! I am definitively a “multipotentialite“. Curisous and passionate about so many different things at the same time: crochet and all things yarn-related of course, but also about managing a creative business, the web and social media, sharing knowledge through workshops and Fiber festivals, the english language and culture/people of all anglo-saxon countries, autonomy and recycling, sustainable living…


And YES I can totally relate and feel I also have those “superpowers“: Idea synthesis, rapid learning and adaptability.

And YES, I feel I’ll be soon ready to accept fully that whenever I put 100% of my energy into something (such as the recent release of my Pop boxy sweater), I then need to do something completely different ( = no crochet!) to regain my balance and happiness… or I would become insane.


This felt so liberating and at the same time, an opening towards so many new horizons and different ways to envision my business, that I even bought a Pack of tutorials and ebooks Emilie assembled esp. for us multipotentialites. It includes tons of ebooks from people I’m happy to discover,

and her “Renaissance business” ebook which I’ve already started and having a TOTAL BLAST with (you wouldn’t believe how spot on she is, and how hepful her exercises are to organise all these different things into something some sort of common theme. SO excited to keep reading !)

and also Mayi Carles “Life is messy “daily planners, which look so cute but are also full of insights (love Mayi’s blog)

PS – If you can relate to this whole Multipotentialite thing and want to explore it further, to grow your creative business, I highly recomment the Pack (priced at only a tenth of its total value, but available only 3 days starting May 17th) and if you purchase it using my link, I’ll receive a commission which will help paying my bills at the end of the month ;-)


So how about you ? What is your “inner wiring” ? Are you a  “Multipotentialite” or rather a Specialist?  I suspect a number of my “creative circle” may be multis too.. ;-)

Yes, I’d love to hear about Sylvie Damey’s next articles & patterns !


There’s these questions every crocheter wonders about at some point, when working rows of Double Crochet:

  • Should I crochet the next dc in the same st as the initial ch3, or in the next st ?
  • How could I avoid this gap between the ch3 and the next dc ?
  • Do those 3 chains count as a stitch or not ?
  • Is there any other option rather than always working 3 chains at the beginning of a dc row ?

To answer those questions, let’s crochet together another pretty sample to try all the various techniques and tricks which crocheters around the world devised. We’ll also try and study and compare them, so you can choose your own personal favorite.

Beyond the ch3, by Sylvie Damey

This time we’ll use plain dc in both loops, so we can focus only on the edges of our sample.
I’ll be using the same yarn and hook as for the previous episodes of the DC project. Start with a foundation chain of 17 chains, 1 dc in 4th ch after hook and in each following chain. You have 15 dc.

1

1/ THE BASIC CHAIN 3 :

Option 1 – ch3 and 1 dc in next stitch = ch3 counts as a stitch: start your row with ch3 and work the first dc in the next stitch.  (click for full-size pictures !!)

2arrow 3

At the beginning of a row, start with chain 3 (= ch3). Your next stitch will be worked in the following stitch, as indicated by arrow.
In this case, the initial ch3 COUNT as first stitch of this row.

4 5

At the end of the row, make sure you work in the top of the ch3 from row below, as indicated by arrow. Because those ch3 COUNT as a regular dc.
If you forget to work in top of those ch3, you’ll be missing stitches very quickly in your stitchcount !

6

And this is what this first method looks like. The sides are pretty even BUT since the ch3 are thinner than a regular dc you may notice a gap between the ch3 and following dc. Depending on people and projects, this may or may not be an issue. To me, this is a super simple method with decent results.

Option 2 – chain 3 and dc in the same stitch = the ch3 do not count as a stitch:  in this case, the first dc is worked in the same st as the starting ch3.

7 8

At the beginning of a row, start with ch3. The next stitch, a regular dc, will be worked in the SAME stitch, as indicated by arrow.
In this case, the intial ch3 DO NOT COUNT as a stitch. They’re a bit like an invisible stitch: we’ll have to pretend we don’t see them… ;-)

9


At the end of the row, make sure you DON’T work into the initial ch3 this time. Those are invisible, remember ?
They don’t count as a stitch, so we won’t work into them or we would add extra unwanted stitches each row !

10arrows

And this what this method looks like. No gap all right, but ugly bumps alternating at the end of each 2nd row. That’s the 3 chains which pop out at the beginning of the rows.

I used to follow this method the very first months I crocheted.. but I quickly discovered I hated it and would never go back  !


2/ THE CHAINLESS STARTING DC

I discovered this technique on Tamara Kelly’s Moogly blog, but this technique has apparently been around for a while and “unvented” by several people.

What I really like about it is that it creates a high stitch very similar to a dc, simply by elongating the initial loop and twisting it over itself. I made a video in french if you feel adventurous, or you could just watch one of those videos in english: : video by Moogly – video by A stitch less ordinary.


Or watch this step by step tutorial:

11 12

At the beginning of a row, stretch your starting loop slightly. Then place your index finger (or whichever is convenient for you) ton top of this starting loop, so that it stays in place no matter what.

Then twist this elongated loop around the hook, going down and to the back of work (videos made it so much easier for me to understand). So now you have what looks like 2 loops on hook (even though one of those “loops” is made of 2 strands). Keep your finger on the top loop !

13 14

Yarn over, and pull through that first “loop” ‘made of the twisted strands). You have 2 loops on hook.

15 16

Yarnover, pull through the 2 remaining loops. You have completed your first chainless starting dc !!

16arrow 17

To continue the row, work a regular dc in the next stitch, as shown by arrow.
At the end of the row, work the last dc in top of the chainless starting dc from row below.

chainlessStartingDCbetter

The end result looks really good IMO. You can hardly distinguish the chainless starting dc from any other dc, as their height and thickness are quite similar.
It’s one of my favorite methods. It might look a bit complex at first, but I swear it gets natural really quick, and will make all the difference if you want real neat edges for your crocheted dc rows.


3/ THE STACKED SINGLE CROCHETS:

Another neat option I discovered while researching for this episode is to stack 2 single crochets on top of each other, using the foundation sc technique. Here again, I made a video, only in french, but which you may find helpful if you’re stuck. (be warned tho, my nails looked terrible yesterday when I filmed it)

And let’s see how to crochet stacked sc to start a row of dc:

18a 18b

At the beginning of a row, work 1 single crochet in same stitch as starting loop, as indicated by arrow.

18 18c

Now we’re going to work a foundation sc into that first sc. See that side strand shown by arrow on the sc we’ve just made ? Insert your hook into that side strand, from right to left for right-handed crocheted (lefties I know you’re competent!). And continue the sc as follows: yarnover, pull through 1 loop, yarnover, pull through both remaining loops.

19 stackedSC

Bravo ! You’ve just completed your stacked sc. It’s also quite similar to a regular dc, only a bit wider at the top. Continue working the row with a dc in next stitch… and end end with a dc in top of stacked sc from previous row.   And this is what it looks like after a few rows. Quite even, and no gap !  It’s also probably less intimidating than the previous method. Tell me what you think !


4/ ONE SINGLE CROCHET + ONE CHAIN:

This method starts exactly but then you replaced the 2nd sc (foundation sc) with a simple chain. Which makes it somehow halfway between the stacked sc and the basic ch3 methods…

28 29

At the beginning of a row, work 1 single crochet in the first stitch, as indicated by an arrow.

30 31

Then work 1 chain over the single crochet. You get a “stitch” that roughly looks like a dc, without the extra width of the stacked sc.

At the end of the row, work the last dc in the chain at the top of the “stacked sc and chain”.

StackedSCandCHAIN

Here again, the resulting fabric has clean edges, with rather symetric ends.


5/ MAMACHEE’s CHOICE:

Tara Murray – aka Mamachee – blogged about  another technique, which is actually a variant of the basic chain3.

To avoid the unsighltly gap between the initial ch3 and following dc while achieving neat edges, she works

  • 2 chains & 1 dc in the very first stitch of the row ( = 2 sts)
  • 2 dc in the last stitch of the row ( 2 dc closed together)

In this case, you work 2 stitches in each edge stitch = perfect symetry.

Here’s a step by step tutorial:

33 34

At the beginning of a row, simply chain 2, and work 1 double crochet in the SAME stitch. Then work the next dc in the next st… ect.

36 37

At the end of a row, work a mini-cluster of (2 dc in the same stitch and closed together). The fact that we jammed 2 sts in 1 both at the beginning and the end of each row means that our swatch is growing wider with this method, as you can see in the 2nd picture.

True, the edges are clean and symmetric. BUT this method will impact the final width of your work. Tara recommended it for a blanket, and that’s probably a good idea to reserve it for projects where final measurements don’t matter so much.


6/ CONCLUSION…

As I did in the previous episodes, you can separate each method by a line of surface crochet: hold the contrasting color yarn UNDER work (on WS) and work a line of loose slip stitch in between 2 rows.

surface crochet by Sylvie Damey

And so, the conclusion you’ll ask ? Well I ask you. I’m sure nearly every crocheter will have a different opinion depending on how they crochet, what they crochet, their habits and the level of detail they like.

Which method do YOU prefer ? And why ? We’d love to know.

alternatives to the ch3 to start a row of dc

As for myself, it depends.  I’m not very picky and tend to stick to the old ch3 counting as first stitch for many projects, especially if a final crocheted edging will hide any existing gap.

For special projects for which I really want neat edges though, I often use the chainless starting dc.

IN my patterns though I always keep the “ch3, which counts as first stitch” convention because I assume that’s what’s most people are used to. And I KNOW that those who use alternative methods will easily translate it into their own favorite method.

Now I want to hear about YOU: what’s your favorite method and why ? Do you know of any other method I didn’t mention here ? If you do, please leave a comment so I can add it here to make this list as complete as possible !


*************************************************

Find out more about all there is to know about the DOUBLE CROCHET with the other episodes of the DC Project:

DC project Episode 1 – learn to crochet double crochet in both loops, dc in front loop, dc in back loop and surface crochet
DC project Episode 2 – differences between double crochet in both loops, dc in front and back loop
DC project Episode 3 – learn to crochet dc in the third loop, front post and back post double crochet
DC project Episode 4 – differences between double crochet in third loop, front post and back post dc 4
DC project Episode 5 – learn to crochet cables
DC project Episode 6 – learn to crochet double crochet in between sts, linked dc and extended dc
DC project Episode 7 – conclusions about double crochet in between sts, linked dc and extended dc
DC project Episode 8 – alternatives to the ch3 to start a row of double crochet

Yes, I’d love to hear about Sylvie Damey’s next articles & patterns !


Finished Compre Loup softie …

Fini
What ?!! … I can’t believe I never showed my finished “Compre Loup” !

fini1 fini4
I made him last year, using a fantastic pattern from french crochet designer Anisbee. (Warning – pattern only available in french)
With such a name, and published nearly at the same time as I published my Loup hooded jacket, I just HAD to make one !

fini5 Loup hooded cardigan]
Little projects like this are perfect to add details, like the spike stitch sweater and long hood to match nearly exactly my own Loup jacket… and even different colored eyes !

TECH
Pattern: Compre Loup by Anisbee (in french only)
Yarn: Remnants of Lett Lopi yarn from my Loup jacket
Hook: 3.75 mm (F) Susan Bates crochet hook
Mods: added a long hood based on my hooded jackets, and left out the tail. It was just too busy otherwise.
If I ever make it again: I’d use a slightly larger hook as it was really fiddly with this one, esp. with the dark grey yarn !

Yes, I’d love to hear about Sylvie Damey’s next articles & patterns !


GraphicSaperlipopette4red

Do you love to crochet sweaters ? or maybe you’re thinking of enhancing your crochet skills and trying to make your first sweater ?

But sometimes following a pattern and counting your stitches gets so boooring

or finding the “right yarn” matching gauge is a pain

or maybe the pattern you like doesn’t come in the right size ..?

maria3 New2b Maud1 (Mobile)

This is where SaperliPOPette! comes right in: SO much more than a simple crochet pattern, this simple and innovative method allows you to crochet a POP boxy/oversized sweater to fit YOUR body perfectly !

  • Use virtually ANY YARN (haven’t tried the extremes of fingering weight or super bulky.. but feel free to experiment)
  • Make it in ANY SIZE from kids sizes to women’s sizes XS to L-XL
  • Plus sizes should work too, but final look may be slightly different (placement of sleeves, look of lower body)

And the best part ? No complicated math, only one arm measurement is needed…
All the “hard” work will be done by trying it on yourself often. :-)

Get this pattern now  on ETSYRAVELRYCRAFTSY !

  New7crop Maud4 Trish4

TECH:
– This sweater is meant to be oversized and slighlty cropped.
– Worked top-down in one piece, you’ll be able to customize it to your own requirements and make it longer if desired.
– Features pretty Puffs along shoulders, and on bottom of body and 3/4 sleeves.
– Pattern is 14 pages long with tons of step-by-step pictures, charts and shematics
– US crochet terms used, with UK equivelents given

Get this pattern now  on ETSYRAVELRYCRAFTSY !

This pattern/system/recipe was thoroughly tested by many testers (special thks to Maria & Trish for their pretty photos used here)


Yes, I’d love to hear about Sylvie Damey’s next articles & patterns !


That’s it.

The contest to win 6 beautiful ergonomic hooks
– 4 Tulip Etimo Rose hooks 
– 2 Prym Soft hooks
is now officially over ! Let’s see which photo won…

ConcoursCrop

To enter the contest, all was needed was to share a picture of your swatch(es) crocheted following an Episode of the DC project, to explore all the variants of my favorite crochet stitch, the Double Crochet !
But first, let’s have a look at all the swatches entered in the contest, and feedback from the crocheters who made them:

AnneLinage AnneLinage2Gde
PHOTOS 1 & 2
Anne Linage followed pisodes 1 and 3 to crochet her swatches
dc in both loops, dc in the front loop and dc in the back loop
dc in both loops, dc in the 3rd loop, front post and back post dc:
She said “J’aime beaucoup le rendu de la troisime partie tout en haut.” (= I really like the look of the dc in the front loop)
“Pas trs fan des gros reliefs, ce que je prfre c’est la deuxime partie en partant du bas” (= Not a huge fan of the relief stitches, the one I prefer is the dc in the 3rd loop)

confiture 3r confiture1r confiture2r confiture4r

PHOTOS 3 to 6
Confituralamure followed every single episode of the dc project, and made a looong swatch showing each series !
dc in both loops, dc in the front loop and dc in the back loop
dc in both loops, dc in the 3rd loop, front post and back post dc
dc in between stitches, linked dc, extended dc
– crocheted cables
She wrote about the whole experience on her (french) blog, and basically even though she’s a designer herself it seems she was shocked by the difference many of those variants made:

“Premier choc, comme une cruche, je m’attendais un rsultat identique sur les brides brin avant et brin arrire. Que nenni ! (..)
Deuxime choc, je n’avais jamais pens piquer dans ce que Sylvie appelle le 3me brin, le petit brin sous les 2 v. C’est pas super facile faire au dbut, mais a donne un chouette effet, comme une lisire de mailles coules. A essayer et utiliser en dco.
Troisime choc, un peu comme pour la bride pique dans le brin avant ou brin arrire, je pensais que la bride relief avant ou relief arrire allaient me donner le mme rsultat, ben non. Enfin si, la diffrence est moindre que pour le brin avant brin arrire, mais on voit clairement une diffrence, au moins de taille. Surprenant. Du coup, je suis perplexe pour l’emploi des brides en relief sur les carrs granny par exemple. La symtrie n’est pas heu… symtrique !
Quatrime choc, la bride lie. Mais qu’est ce donc que cette bte l ??? Ben c’est nouveau, a vient d’sortir. Enfin, certainement pas pour tout le monde, mais pour moi, si. Et le rsultat est jouli jouli !! Je m’en reservirai, c’est sr et certo.”

Kims Colourway

PHOTO 7
Kims Colorway tried the dc in both loops, dc in the front loop and in the back loop with episode 1.
” Very interesting! I never thought of that before! Thank you so much for sharing your knowledge.” 

MarieJuglair

PHOTO 8
Marie Juglair followed episode 6 for her swatch: she crocheted the dc in both loops, linked dc, dc in between stitches and extended dc.
“J’aime bien la bride lie qui donne un effet bien serr et qui permet de ne pas doubler si on fait une pochette (car je ne matrise pas bien la couture…)”
= I like the linked dc which has a tight look and allows to skip the lining if making a bag (as I don’t master sewing very well)

SandrineCampana

PHOTO 9
Sandrine Campana crocheted dc in both loops, dc in the front loop and dc in the back loop following episode 1 of the DC project.

And now… Bam !
I entered the data in the “Random number generator” and:

Contest

The winner is photo 8: Marie Juglair. Bravo !!
(please send me your adress and I’ll send the crochet hooks)

Ariane cardigan, with long sleeves

Ariane3

Back from 10 days of holidays in the south of France. Perfect timing to finish my “Ariane cardigan” by Peggy Grand and finally add some buttons (on the “men’s side” but oh well, who will ever notice ?!).

I love the mesh rows in the top section, and would you believe it’s my first time ever trying Pineapple crochet ?
So easy, and yet the result is so pretty !

The very wide neck is the perfect occasion to couple it with my new Dancing Marguerites shawl..

Ariane5 Ariane2 Ariane4

This project took a looong time to complete, over 6 months ! It’s been sitting in our living-room all winter, and I’d alternate between this and all my other ongoing projects.

Thing is, the pattern is free but full of errors and lack of precisions. After starting a few rows, I ripped it all back to setup row and started using removable stitch markers to locate the raglan increases instead. Worked like a breeze.

I also wanted to add long sleeves, so the “improvisation” part might also explain how long this took… But so glad I did, I like cozy and warm sweaters, feeling always cold !

Ariane1

Loved making this though. Not so much because I learned new things but because it puts all the things I already know about crochet in a different perspective. Generating new ideas… Including my newest “Saperlipopette” boxy sweater and its innovative system to crochet a sweater in any size with any yarn which will be published very soon!

TECH:

– Pattern: Ariane cardigan, free pattern in french & english by Peggy Grand
– Yarn: 2 strands of thin coned yarn held together, 1 plum acrylic blend, 1 chestnut mohair blend
– Hook: 5 mm Susan Bates crochet hook
– Mods: added long sleeves, added a lower edging using 1 repeat of top motif, made the pineapple section longer.
– If I ever make it again: I’d make the top body section longer as it ends right in the middle of my bust and I’d prefer to cover all the bust section.

Dancing marguerites shawl by Sylvie Damey

How about a fun and fresh project for the spring ?

Dig out some of the prettiest balls of yarn from your stash and crochet away !  This shawl is worked sideways in one piece, starting with the narrow end.

New1d New4

Some of the reasons why you’ll love making this shawl :

  • it’s worked in dc in the front loop for beautiful drape (and less yarn used)
  • features a pretty and delicate Marguerite floral motif (full photo tutorial and chart included)
  • totally unique Dancing Poppies edging along one side of shawlette

Oh, and wait, there’s more:

  • Instructions are written to make this with ANY yarn you want.
  • Just work as many repeats as desired and stop when you run out of yarn or reach the desired size for your shawlette. How does that sound ?!

New5b Noro4r2

A dream to make and wear…

Pattern is now on ETSY & RAVELRY !

Yes, I’d love to hear about Sylvie Damey’s next articles & patterns !


chezplum.com - patterns design - © Sylvie Damey
 

Page created in 0.668 seconds and powered by WordPress