NatCroMo – Tutorial: how to crochet a seamless top-down sweater

Welcome to the NatCroMo blog tour !
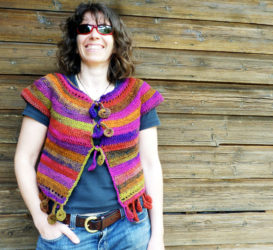
My name is Sylvie Damey, and I’m a french crochet designer. I love to design crochet garments that follow and hug the beautiful curves of your body, using the technique of the top-down seamless sweaters.
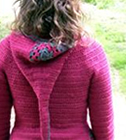
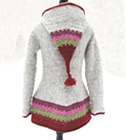
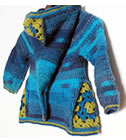
I design for women and their little ones. Sometimes I add hoods too… long pixie hoods because everyday should be fun !


![]()
To celebrate NatCroMo, I have a surprise for you:
Learn to crochet a mini-sweater with the free tutorial below: Enjoy !
If you’ve never crocheted a garment and are scared to start, fear not !! Here’s a free tutorial to guide you through the various steps, explaining as we go why we do things. Featuring very few stitches & rows, you can make it in under an hour. Yet it includes all the features of a “normal” top-down cardigan so you can use this project as a confidence-booster to tackle full size sweaters next !
* Sign up for my NEWSLETTER to be the first to know when I release a FREE pattern for a beginner friendly womens top-down cardigan… & other exciting new patterns or promotions ! *
Skills needed: slip stitch, single crochet, double crochet (US crochet terms)
1/ Construction of a seamless top-down sweater
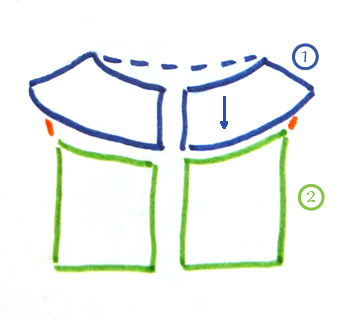
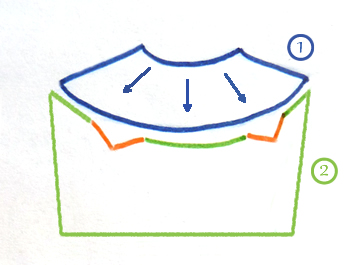
- Since this is a top-down construction, we will start at the top, with a long foundation chain for neck.
- Then we increase evenly to create a round yoke. This is step (1), shown in blue on diagram.
- Next, we skip a given number of stitches to create “holes” for arms. Those skipped stitches and neighboring Double Crochets (which will stretch into being nearly horizontal when sweater is worn) are shown in orange on diagram.
- Finally, we’ll crochet on the remaining stitches to create the body of sweater: That’s step (2) shown in green on diagram.
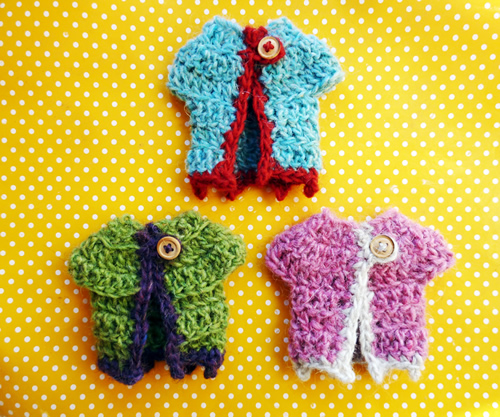
2/ Let’s crochet a mini-sweater !
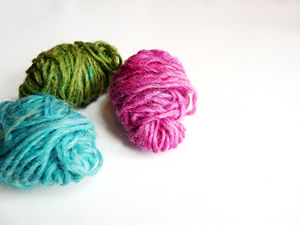
Materials
You can use any remnants of yarn for this project.
– You won’t need much yarn : I used approx
7 grams (counting both colors used) of aran “LettLopi” yarn
– crochet hook suitable for yarn used + another hook 2 sizes smaller for buttonloop. (I used susan Bates H & G hooks)
– 1 small button
1/ Getting started: Foundation chain & starting row
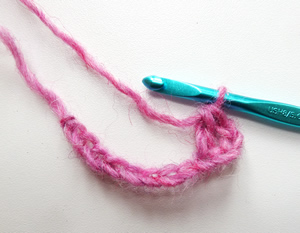
Start with a sl ip knot, and a foundation chain of 19 chains.
First row – starting row: Work 1 Double Crochet dans la 4th chain AFTER hook (= do not count loop on hook). Continue with 1 Double Crochet in each of the next stitches along foundation chain. Count your stitches: you should have 17 stitches = 3 chains which count as 1st stitch + 16 Double Crochets. Turn work for next row.
Tip: To count stitches, count the vertical bars – each bar = 1 Double Crochet (or equivalent 3 chains)
2/ Increase for yoke
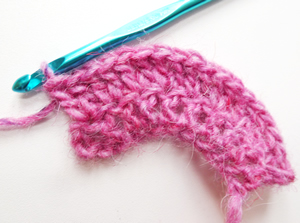
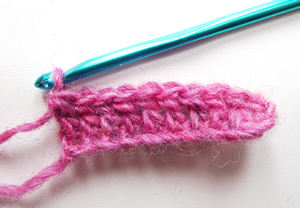
Second row –increase row: 3 turning chains. Those 3 chains count as 1st stitch. And since we increase in each stitch, work 1 Double Crochet in the SAME STITCH (= base of the 3 chains). Continue to increase, working 2 Double Crochets in each of the next 16 Double Crochets (make sure you crochet in the final ch3-from-row-below, as those count as a stitch).
Count your stitches: you should have 34 stitches = 3 chains which count as 1st stitch + 33 Double Crochets. Turn work for next row.
You can already see that work is curcing because of the increases : This is normal, it’s actually THE typical shape of round yoke sweaters.
Third row: 3 chains (= turning chains). Work 1 Double Crochet in NEXT stitch this time, then in each of the next 33 stitches.
Count your stitches: you should have 34 stitches = 3 chains which count as 1st stitch + 33 Double Crochets. Turn work.
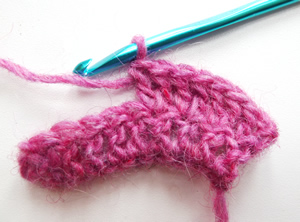
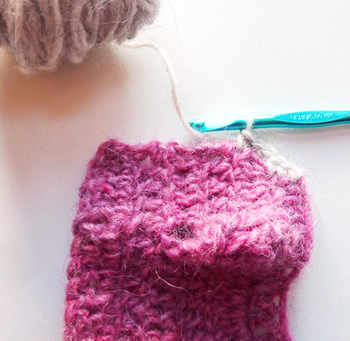
3/ Create “holes” for amholes
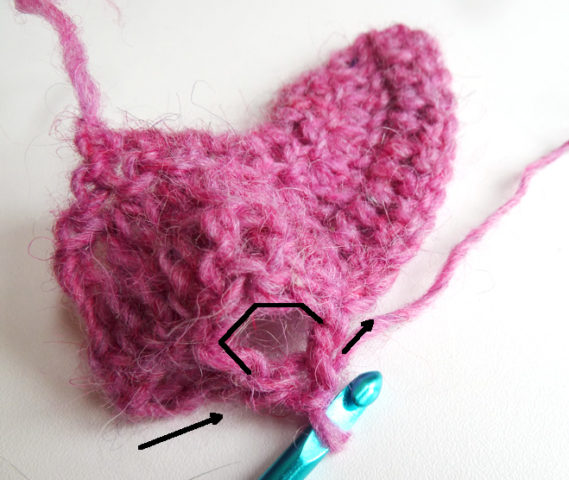
Fourth row – skip stitches for sleeves: 3 turning chains, then work 1 Double Crochet in NEXT stitch, and 1 Double Crochet in each of the next 3 stitches. You have 5 stitches for 1st half-front of cardigan.
Then skip the next 7 stitches (= do NOT crochet in those stitches, but crochet directly in the 8th stitch) to create 1st armhole – see picture above.
Work 1 Double Crochet in the stitch located right after the 7 skipped stitches, and continue with 1 Double Crochet in each of the next 9 stitches: that’s 10 stitches total for back of cardigan.
Next, skip another 7 stitches as previously to create 2nd armhole.
End with 1 Double Crochet in each of the last 5 stitches. You have 5 stitches for 2nd half-front of cardigan.
Count your stitches: you should have 20 stitches for body of cardigan. Turn work for last row.

4/ Lower body
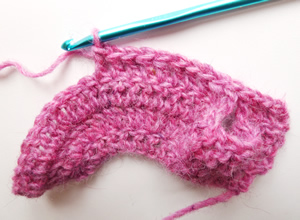
Fifth row: 3 turning chains. Work 1 Double Crochet in NEXT stitch, and 1 Double Crochet in each of the next 18 stitches. Count your stitches: you should have 20 stitches. Fasten off and break yarn.

Fold the half-fronts. Now it totally looks like a cardigan, with the collar and yoke, 2 armholes &the lower body.
5/ Final edging around cardigan & buttonloop
Join contrasting yarn to top right corner with a slip stitch.
Work 1 single crochet in corner stitch, then a 2nd single crochet along the side of the Double Crochet (end of double crochet row). Continue to go down along 1st half-front in single crochets, working 2 single crochets along each end of row in Double Crochet.
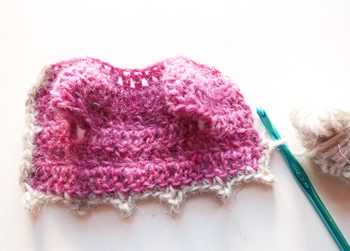
Once your reach lower corner, work [1 single crochet, 3 chains and 1 slip stitch in the 1st chain (=1 picot), 1 single crochet] in that corner stitch.
Continue along bottom edge as follows : 1 single crochet in each of the next 3 stitches, 3 chains and 1 slip stitch in the 1st chain (=1 picot), *1 single crochet in each of the next 4 stitches, 3 chains and 1 slip stitch in the 1st chain (=1 picot)), repeat from * 4 times total, ending in corner stitch.
To turn, work another single crochet in the same corner stitch (where you already worked 1 single crochet and 1 picot). You have 6 picots total: 1 picot in each corner + 4 picots in between.
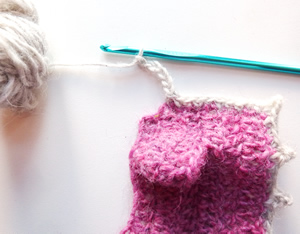

Finally, work your way up the 2nd half-front as as for first, up to last row of yoke (= you have 8 single crochets after corner stitch) and create a button-loop as follows: With smaller hook work 6 chains and 1 slip stitch in 1st chain.
Finally, swith back to larger hook and work your way up to top corner. Fasten off and break yarn.
Sew button facing button-loop. Weave in any remaining ends.
Voil� !!! You’re now officially a sweater crocheter!
Ready to tackle real-size sweaters now ?
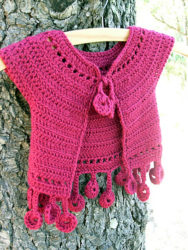
Go ahead and try the Dancing poppies Cardigan or Dancing poppies Baby bolero: they use exactly the same technique and construction.
You can do it ! :-)
* Sign up for my NEWSLETTER to be the first to know when I release a FREE pattern for a beginner friendly womens top-down cardigan… & other new patterns or promotions ! *

6 Comments »
RSS feed for comments on this post. TrackBack URI
Leave a comment
Line and paragraph breaks automatic, e-mail address never displayed, HTML allowed: <a href="" title=""> <abbr title=""> <acronym title=""> <b> <blockquote cite=""> <cite> <code> <del datetime=""> <em> <i> <q cite=""> <s> <strike> <strong>
March 15th, 2017 @ 2:57 pm
[…] Visit Sylvie’s Site: NatCroMo Specials […]
March 15th, 2017 @ 8:22 pm
I love your patterns! So colorful! I will be following your mini sweater tutorial. Thank you for the free pattern!
March 16th, 2017 @ 2:03 am
Thank you for simplifying the top down method of garment-making!
March 16th, 2017 @ 2:39 am
Thank you so much for celebrating InterNatCroMo 2017 so generously, educationally, and beautifully! Merci beaucoup, Sylvie!
March 18th, 2017 @ 5:03 pm
Sylvie, thank you so much for being part of our Crochetville blog tour!
August 5th, 2018 @ 10:12 pm
Sylvia–please show us how you crochet the poppies on bolero. Is it 12 dc into 3rd chain from hook or 5th ch from hook. Though experienced, I couldn’t figure out how to make poppies consistently.